Blog »
My SAI Drawing Process
I was going to write a post about a different art program today, but I ended up realizing that there was no way I was going to draw someone else’s character in a program I wasn’t familiar with, so I ended up just using SAI instead. (The inkling in the example art is a piece I owed someone, and it seemed like a really bad idea to get frustrated with a new program while simultaneously drawing something I wasn’t used to.)
Anyway, here’s a little breakdown of my process, since I haven’t done this in a while. At the end of this step-by-step, I have the SAI file linked, which you can feel free to download and look at. (Do make sure you have the newest SAI, or I’m not sure it’ll have the layer modes that I used.)
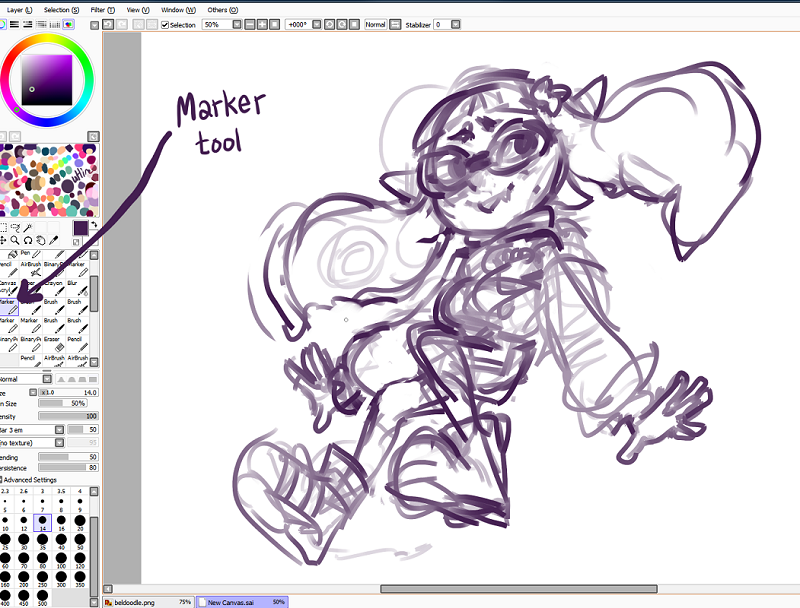
To start off, I always like sketching with the marker tool. It gives me a lot of areas that aren’t fully opaque and has a really interesting way of applying color. It’s not really the best for final rendering, for me personally, but I make almost exclusive use of this tool in the pre-rendering stage.
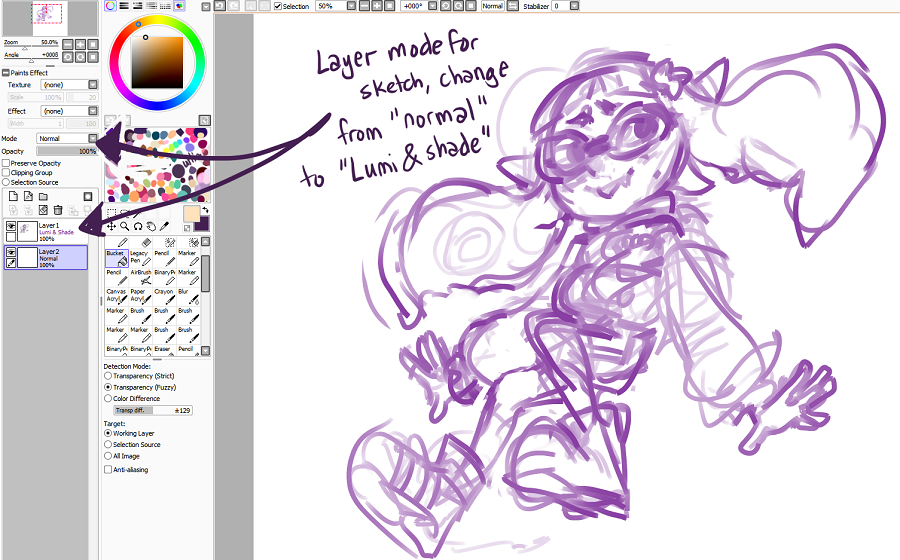
I often set the sketch to Lumi & Shade mode. This does some really cool things to the colors beneath it.

I then fill in beneath the sketch. You can start to see what Lumi & Shade is going to do to the colors! 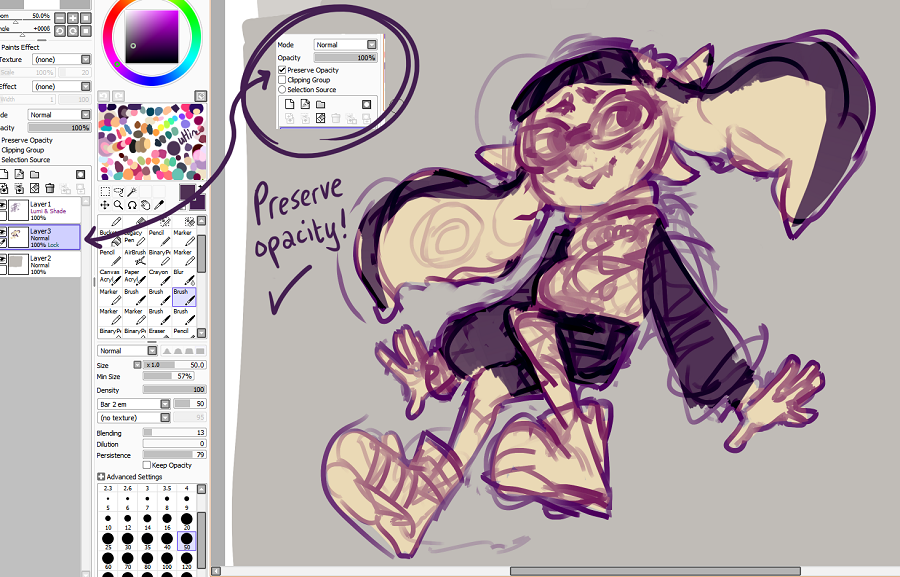
I set the flat color layer to have an Opacity Lock on it, which makes it so that you cannot change the opacity of the layer. This means that in areas without any color on that layer, you can’t add color. What this means in practical terms is: no coloring outside of the lines! So, I start putting down the base colors of the character here, without worrying about the colors going where they shouldn’t be.

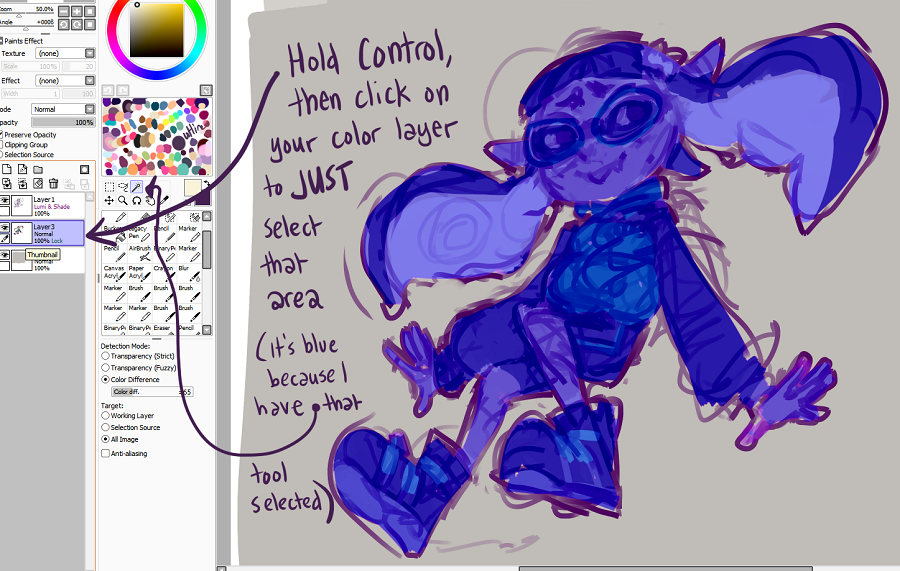
After I’m satisfied with the base colors, I hold the CTRL button and click on the flat color layer. It then selects everything within that layer, so that I can make more layers and start applying layer modes only within the colors of the character. This means I won’t accidentally be shading the background or anything like that.

As you can see, the gray color in the background is untouched, but all my shading is where the flat colors were placed. Hooray! At this point, I tinker with the sketch layer a little and then start rendering.

This is where I switch brushes. I start using a “brush” tool (a rectangular flat one -- I’ll cover brushes in some other blog post), and at this point it’s just a matter of carving away at the drawing. For me, the sketch layer is just a guideline for the finished drawing. It’s there to give me a bunch of colors to grab from when I’m actually starting to render it. It would be kind of hard to do much with my sketch if someone else had to render on it -- because the sketch is arranged specifically in a way where I know what I want to do for the finished product, but someone else wouldn’t be able to tell! So it’s okay if the sketch is kind of messy, as long as it conveys just enough for you to be able to make a finished painting out of it.
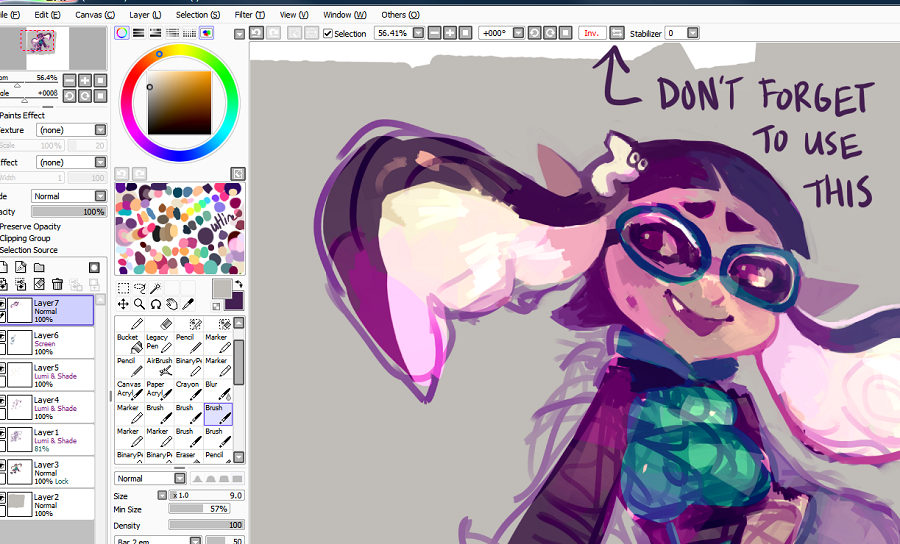
Also, please keep in mind this amazing flip-horizontal tool. As much as it sucks to flip your image and see tons of flaws, it sucks worse to do it after you’ve already finished the piece! So do it every so often in order to gauge whether or not the drawing is wonky. It’s super duper helpful for fixing faces, so make use of it.
And here’s the finished drawing!

There are a good handful of differences between the finished drawing and the sketch! And that’s fine with me. Like I said, the sketch functions as a guide for whatever you want to do with the finished painting. (If you want to check out the SAI file for yourself, you can grab it from here.)
I’ll probably go over brushes and other stuff at a later point in time, but this is the basic way I put together a drawing! This is sort of the default way I work. There’s a lot more to SAI that can be covered in many posts, but check SAI out in the meantime if you have Windows!
And also, if you have any suggestions for topics I should cover, feel free to leave them in the comments below!
Comments